.jpg?v=1ge5t04)
.png?v=1ge5t04)
TubeOhm Instruments
mail: kontakt@tubeohm.com
For our customers from UK. Some of our kits are available for purchase again through Exploding Shed. Please follow the link.
https://www.exploding-shed.com/tubeohm/
https://www.exploding-shed.com/sonic-potions/
Questions ?
Contact me : kontakt@tubeohm.com
DIY (do it yourself) is also a fantastic hobby in the music sector.
Thanks to ever more powerful processors and newly developed analogue ICs, DIY musical instruments are now possible that would have cost an enormous amount of money a few years ago.
However, to successfully build DIY instruments you need a basic knowledge of electronics and solid and good tools.
Knowledge of the various basic components such as capacitors, diodes, resistors and transistors is essential.
https://www.makerspaces.com/basic-electronics/
You can also try a book on the basics of electronics.
The circuit diagram.
The circuit diagram shows how the individual components are connected to achieve the desired function.
If you cannot read a circuit diagram, you have no chance of finding it in the event of a fault.
It is therefore essential to familiarise yourself with the circuit diagram.
Take a circuit diagram, e.g. of the Shrutho SMR4MK2, and try to find out how it works.
In audio electronics, you always have an input signal that is changed by several circuits and then output again at the output.
Input - processing - output
Try to proceed according to the TOP-DOWN principle.
It is easier to look at a circuit in larger function blocks and then break the individual blocks down into smaller and smaller functions
Our SMR 2 is again used as an example.
We have an input amplifier (block 1). After the input amplifier come 4 x 6dB LP filters (block 2)
The output of the filter goes into a VCA (voltage controlled amplifier (block 3) and somehow the filter has to be influenced by cutoff and resonance.
We call this function (block 4).
So we have divided a somewhat more complicated circuit into four function blocks. These blocks are now easier to analyse.
How do I solder?
Modern soldering agents are lead-free, but require a higher soldering temperature. I can recommend ISOCORE 'Ultra Clean' 0.5 mm from Felder Löttechnik.
As the solder requires a higher temperature, it should be possible to regulate the temperature of the soldering iron.
I solder at approx. 350..370 degrees.
But you should also practice soldering. Either you take a simple DIY kit and not the biggest and most complicated one straight away, or you get a defective circuit board and solder it as a test. It is important that you get a feeling for how the solder has to flow in order to make good contact.
The following should be said about the temperature setting.
The heat from the soldering iron is dissipated through the copper surfaces of the circuit board. If the soldering iron has too little power, the tip cools down during the soldering process and the solder does not connect to the soldering pads on the board. As a result, so-called cold solder joints arise. Although they look soldered, they have no contact with the component or the circuit board.
If the soldering iron is set too hot, the components or the adhesive of the conductor tracks on the circuit board can be destroyed.
It is therefore fundamentally important to deal with the soldering process, the solder, and the soldering temperatures.
Now we come to the tools .
Your DIY results will only be good with good tools. This includes a side cutter and a soldering iron that can be temperature controlled, a multimeter and some screwdrivers are essential. If you want to delve deeper into the subject of electronics, I also recommend an oscilloscope.
Let's start by defining the term .
What is a DIY kit anyway?
There are several versions of the DIY kits.
1) complete kits, these contain all the parts required for construction, pre-programmed processors and also a housing.
2) Kits with components that are difficult to obtain, e.g. our Jeannie synthesiser always includes the display and the pre-programmed EE-Prom with the circuit boards.
The rest of the components can be ordered from various electronics dealers. Jeannie is of course also available as a complete kit
3) Only the circuit boards. All parts must be procured by yourself .
A complete kit is of course more expensive because we have to buy the parts and then sort them.
All DIY kits are well tested and if you do a 100 % work , it works on the first try. BUT, It should be clear that - if you only solder one part wrong - the complete machine don't work- or will not work in the right way .
What else needs to be purchased in addition to a kit?
A kit does not include a power supply unit. Furthermore, we are not allowed to sell SD Ram cards or CDs as these fall under GEMA.
In the operating instructions or the DIY manual it is discussed in detail which power supply or which SD card is required for the respective instrument.
The data of the SD Ram card is provided on our website.
DIY Products
Eurorack module
SMR4-P
multimode filter
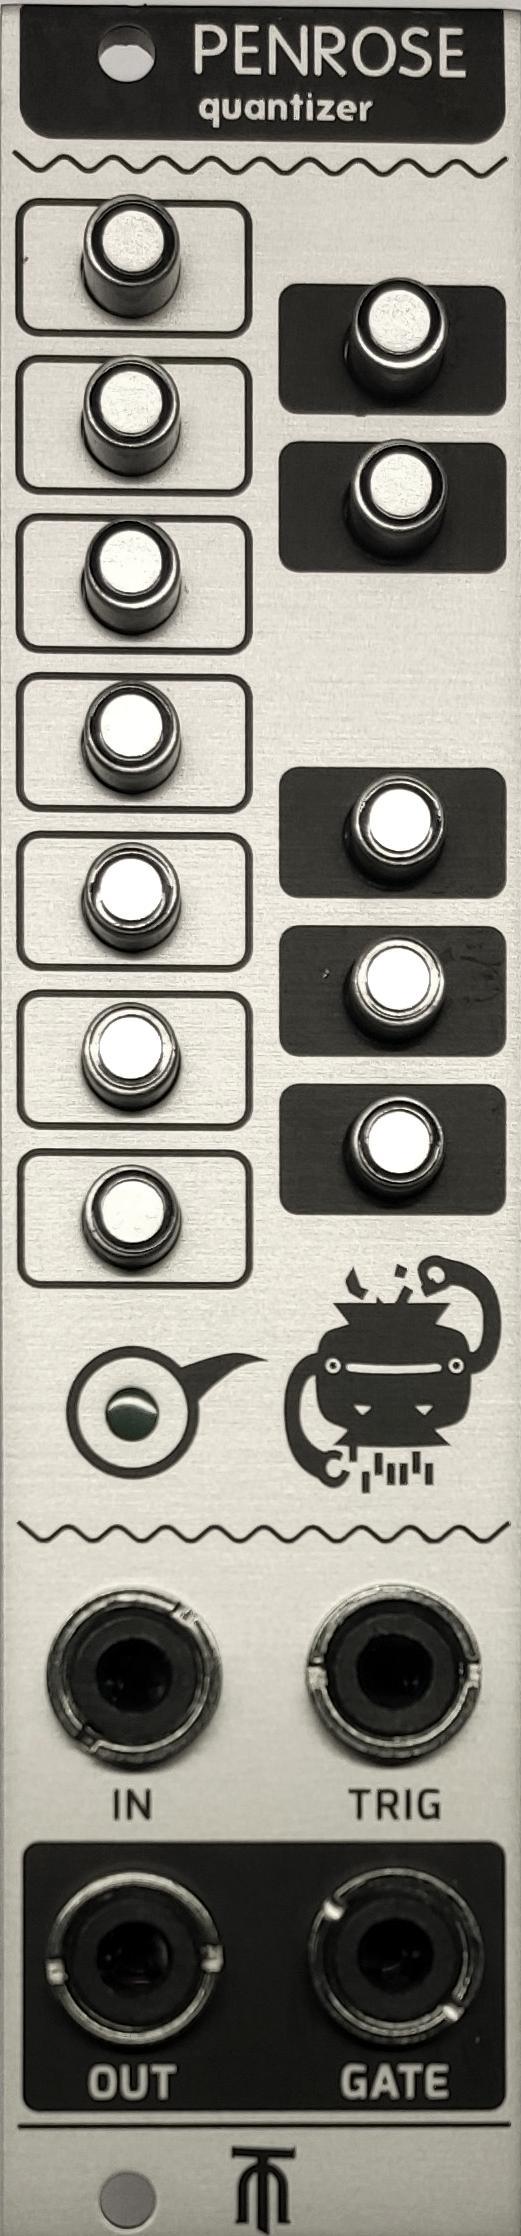
Penrose
quantizer
MAL 2
Erisian noise generator/LFO
DESCENT
AD Generator
DIY music Synthesizer
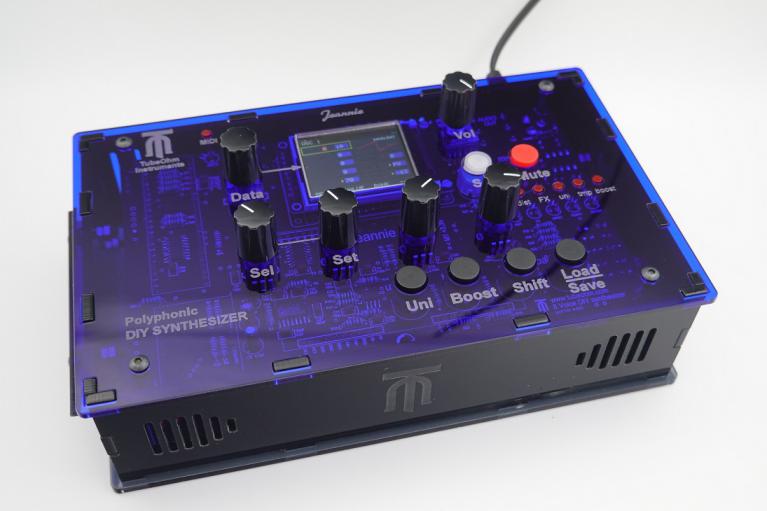
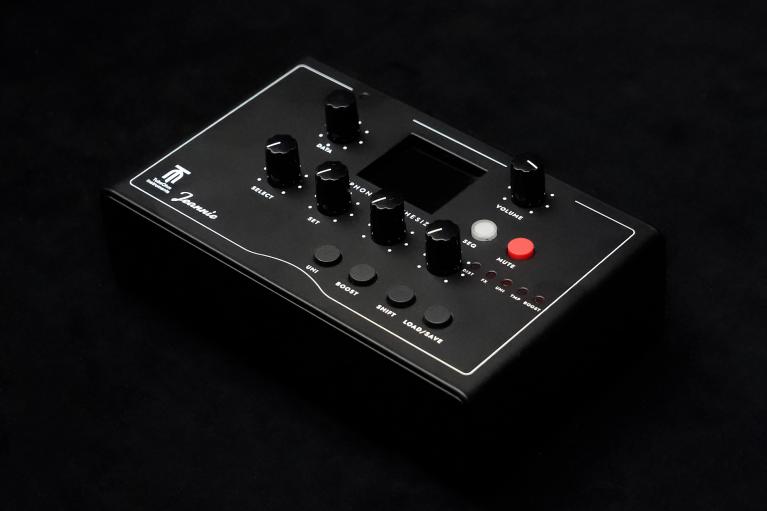
JEANNIE 8 Voice poly DIY Synthesizer
>>>>> more info ? Click on the picture
New in 01.24
We have implemented 21 new oscillator models from Shruthi (formerly Mutable Instruments synthesizer) and Braids (MI eurorack oscillator) in Jeannie. In addition to wavetable synthesis, various ring modulation models and PD models can now be selected and modulated by the LFOs and ADSR generators.
Jeannie, our latest DIY synthesizer, release in 2022 .It is 8 voice polyphonic and easy to build.
Boards with soldered SMD ICs and complete kits are available in our shop.
Jeannie is one of the first DIY synthesizers that has its own effects module with reverb, chorus, delay, pitch shifter ..... on board.
Furthermore, you can choose between a state variable and a ladder filter in the synthesizer section. A step sequencer is also implemented.
Furthermore, there are polyphonic waveshapers, 3 LFOs, 2 envelopes, 800 waveforms/oscillator, 64 waveforms/LFO, filter FM and much more. But the most important thing is that it sounds great.
SHRUTHI / PHOENIX and TX monophoner DIY Synthesizer
>>>>> more info ? Click on the picture
NEWS: There is a Walker sound edition for the Shruthi SMR4-MK2 filter. This allows the SMR4-MK 2 filter to be converted into a multi filter. We have developed a circuit board for the Walker edition that can be installed in a Shruthi XT and on a normal Shruthi with another case .
The following features are then adjustable (cannot be saved)
1) eight different filter types
2) eight different distortion types .
3) Resonance compensation and compression

Phoenix, formerly Shruthi from Mutable Instruments, is a perennial favourite in the DIY scene. It is available in different versions and with different filter boards which can be easily retrofitted.
No matter if SMR4 filter or 4PM or CD 4069 filter. The sound blows you away.
The monophonic synthesizer contains an analogue filter combined with a digital sound generation. A modulation matrix, 2 oscillators and a sub-oscillator provide the sound.
The sound can be modulated by 2 LFOs or 2 ADSR generators.
An analogue filter and an analogue VCA give Shruthi the analogue feeling.
The new CD 4069 Shruthi/Phoenix and the V2 version of the motherboard even have analogue inputs that can modulate different destinations in the mod matrix.
The V2 motherboard is 100% compatible with all Shruthi/Phoenix filterboards. However, if you want to use the analogue inputs, you should order a Case V 2.
TuBika/Ambika DIY poly synthesizer
>>>>> more info ? Click on the picture

TUBIKA (formally called AMBIKA) - a six voice polyphon DIY synthesizer
Unfortunately this project has been ended. Existing parts such as housings will be sold off.

LXR - is a Drum Machine, made by Sonic Potions . .
Shop Service
Hotline
Information
national:02368 57164
international:0049 2368 57164